by Sandy McCauley | Apr 4, 2009 | Free Videos, KNK Samples, Outlining Images, Welding

In early March, I taped five segments for a PBS show called Creative Living with Sheryl Borden. The episodes with these segments will air on ~140 stations next fall however we had permission to put the segments on You Tube now. The first segment was over 10 minutes and, thus, needed to be broken into two videos for You Tube.
KNK for Scrapbookers and Card Makers Part 1
KNK for Scrapbookers and Card Makers Part 2
Below are close-up photos of some of the samples I presented during this first segment. Note that you can click on the images to get larger views!
The following beautiful layouts were designed by Susan Mast who owns Master Scrapbook Designs. Susan has been using Klic-N-Kuts in her business for just over two years:

I loved Susan’s use of the tiny brads to enhance both the flourish and the words she cut on her Klic-N-Kut:


Check out the incredible number of layered flowers used on this next layout:


Because we hear from so many scrapbookers interested in using overlays in their scrapbooking, I provided Susan with an overlay file from Diana’s Designs. Susan used this file to create a layout of her brother on vacation in Jamaica:


Susan teaches mini-album classes at Scrapbooks, Etc in Mesa Arizona. Here is one of my favorites which shows her fabulous use of small embellishments designed and cut on the Klic-N-Kut. In the taped segment, I show one of Susan’s “blank” copies. The one below is the actual mini-album I created when I took her class.


This is the other mini-album shown in the segment. I had Susan email me a few photos of her finished copy:


The following two cards were designed and cut by Chris Giannoulas who owns a Klic-N-Kut Maxx and has started a card business in southern California. She creates these intricate designs and then cuts them from fairly stiff, high quality cardstock. They’re just beautiful to hold and view in person.


These two insects were auto-traced from a Close to My Heart stamp set and the tracings expanded using the Outline function in KNK Studio. Next the insects were cut from white cardstock and then stamped with the actual stamps. I have a previous blog post which covers the details: Creating Cutting Files from Your Favorite Stamps

In this card, I used a dingbat font to type out the flower. Then I simply welded that flower to the inside of a rounded rectangle. This literally took a minute or less to design.

Now for some recipe layouts! In this layout, I stenciled the letters so that the interior parts woud stay connected to the outside:


My friend, Brenda Schonig, created this adorable layout. I love the die cut of the monkey.


This comical banana is one of the 4000 .knk files which comes with the purchase of a Klic-N-Kut. I also wanted to show how I had welded the letters in “Flaming” to a rectangle so that I could keep the letters separated for better readability but at the same time, have everything cut as one piece for easier gluing onto the layout:


This is a close-up photo of a print and cut done on the KNK Maxx. The laser light makes the print and cut process relatively fast and definitely very accurate:

Finally, here is the example cut in the show. Note the really cool 3 dimensional look from using the Shadow function in KNK Studio:

As the other segments are uploaded to You Tube, I will be posting the links and more photos here. If you have any questions about the Klic-N-Kut or any of the projects, please feel free to email me at smccauley45@cox.net. I sell Klic-N-Kuts on commission with the makers: Accugraphic, Sales. Their web site is: Scrapbook Die Cutter. Note that I provide extra support and videos to my own customers, so please contact me if you are interested in purchasing a Klic-N-Kut.
by Sandy McCauley | Mar 24, 2009 | Array, Flowers - Designing, Free Files, Free Videos, Outlining Images, Transformation

Thanks to Pam Z for requesting help in designing a particular kind of flower to cut from vinyl. As always, these requests motivate me to try new things in the software and I found a way to design a different kind of petal and then use the circular Array function to create a quick flower from the petal. The video can be viewed at:
Creating a Hollow Petal Flower
If you’d also like the .knk file of the two flowers I show above, then just grab it from here:
Hollow Petal Flowers
by Sandy McCauley | Feb 3, 2009 | Editing, Free Files, Free Videos, Outlining Images, Tracing
 At the new KNK_Groove Yahoo group, Sherri P posted that she was having some problems following the user manual tutorial on tracing. I replied that the new Vectorize Wizard is so loaded with functionality that it can be overwhelming to follow the many steps I show in the manual. Because Sherri had scanned the image she wanted to trace and only needed a simple tracing, I suggested she send me the file so that I could show her a quick way to trace it.
Well, the interesting thing about this particular image (and why my readers here ended up with a free video) is that this is a situation outside of what we normally see when tracing. First of all, one would think this would be ideal for using center line tracing because it’s basically an outlined image with a white filled center (refer to my Center Line Tracing video or any of the KNK Studio manuals). I tried Center Line Tracing, however instead of ending up with separate puzzle pieces (the goal of this project), I had an overall outline of the dinosaur with separate, disconnected lines for the middle of the dinosaur. Now this would be perfect if the user planned to just cut the outside of the dinosaur and then, perhaps, dash-line cut the intererior lines. But to achieve 3 separate puzzle pieces, Accuscan would be needed instead.
Now tracing it was easy (as you’ll see in the video). The next issue was that the trace lines will be made on either side of the outlines of the image. In most cases, this is also never a problem. But with Sherri’s project, we needed to end up with three puzzle pieces that fit together. So, I came up with the idea of using Transform>Outline to make some of the pieces just a tiny bit bigger, resulting in a better puzzle fit.
So, check out the video and I also am including a link to the original KNK file sent to me by Sherri in case you want to play along! Special note to non-Groove and non-Maxx owners: this same method should work for those of you with the original monochromatic vectorizing (just use the Scan and Trace Wizard) and those of you with color vectorization (same method I show in the video).
Tracing and Editing Sherri’s Dinosaur
And then here is the original file:
Dino Puzzle To Trace
I also sell a video on using the Auto Tracing for KNK, ACS, DM and plan to have a new one soon covering the details of the Vectorize Wizard available in the latest KNK Studio Maxx software.
by Sandy McCauley | Jun 24, 2008 | Contour Object, Free Videos, Outlining Images
A huge thanks to Lisha for our class today in which I stumbled upon a brand new shortcut trick that will TOTALLY blow your mind! lol Well… perhaps only if you’re KNK Studio Addict like me! lol But it IS a goodie!!! Watch this video:
ContourObjectCustomization
by Sandy McCauley | May 31, 2008 | Erase, Graphic Edit Tools, Outlining Images
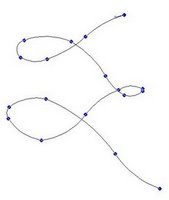
Today’s tutorial is a design question that’s never come up before. Karen wants to create a swirling path of small rectangles resembling the path a bumblebee might take. 🙂 I had to think about this one for a while and finally came up with ONE method. I’m not sure it’s the easiest one in KNK Studio, but it will get the job done.
Select the
second icon under
Graphic Edit Tools and just randomly draw a path as shown in the figure on the left.
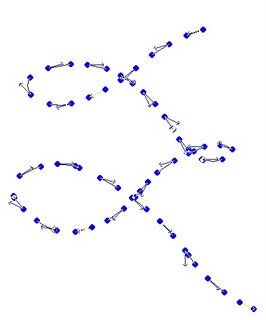
Select your path and go to Arange>Convert to Polyarc, then go to Arrange>Reduce Nodes and enter 0.05. Click on OK. Double click your image to bring up the nodes, as shown on the right.
Click on the second trash can icon up on the Smart Bar:

The purpose of this icon is to erase path segments. So move in a little ways from the start of the path and click once, then go a little further and click again. The path between the two clicks will be erased as show by the two arrows in the diagram to the right.
Skip ahead, repeat with two clicks to erase another path segment. While you can’t be exact in the spacing, in the end the result will be fine. Continue until you reach the end of the path.
Click on
Apply and the resulting image will be as shown on the right.
With the image selected go to
Transform>Outline. Uncheck
Inline, make sure
Keep Original is not indented. Then enter a value of, say, 0.04″. Click on
Close and the end result will be as shown below!

by Sandy McCauley | May 18, 2008 | Links, Mask, Outlining Images, Shop Palette
I had several new things that popped up this weekend, so I think I’ll just cover all three in one post:
(1) A couple of new links to recommend:
http://www.picsearch.com/(type in anything you are seeking and it will find images all over the Internet with that name in the file… great for finding images to trace).
Coloring Page of the Day: see the bottom of my blog for the link. While these aren’t vector pdf’s, they do import easily into KNK Studio and yield some great tracing results, using default settings. Check back every day to see if you can use the latest image. Also note the site has past coloring pages arrange by theme to download.
(2) A GE owner had been playing around with the Shop Palette and inadvertently saved her new configuration as the default. I’ve done this myself and I’m not sure what happened, but there is a fix. First of all, try clicking on the
Context Menu icon on the
Shop Palette (it’s the one with the three little dots). In that menu, click on Reset and see if the original palette is restored. If not, then you need to replace a file called factorydefault.pal with the original… which can be downloaded from:
https://www.iloveknk.com/ImportantFiles/KNKStudioFiles/. Simply save this file into c:\Klic-N-Kut Studio (or whichever folder contains your KNK Studio installation). Answer OK or YES when asked if you want to replace the existing version. Open KNK Studio and you should have the original restored.
(3) One of the readers here asked for an example showing masking. I thought about it and the best example that came to mind would be file where you have several objects that are different colors and you want to create an outline around those objects, but retain their original colors (Let’s say you want to cut Happy Birthday from different colors of cardstock and have the letters adhered to a mat). In the
Transform>Outline window, make sure both of the icons on the far right are indented:
Keep Original and
Create Mask. Create your outline and after closing, you will, for some reason, have a duplicate of your original images in the new trace color. Simply delete it and you will also have your originals in the individual colors. In the following figure, I show the three steps: the individual letters colored, the image right after closing the
Transform>Outline window, and finally the result after deleting the copy of the letters that gets created and placed on top of the originals:


