Page 28 - Orignal Klic-N-Kuts with MTC User Manual
P. 28
more precise than WYSIWYG because it takes into account not only any misalignment of your printout on
the mat, but also any errors in the printing. Most printers do not print images in the same location on the
paper as they are located on the screen.
Note that raster images (.JPG, .BMP, .PNG etc) will need to be pixel traced first so that cut lines are
created. Refer to Chapter 6 for tutorials on how to do the pixel tracing (also called vectorizing).
Refer to Chapter 9 for tutorials on the print and cut process.
2.08 Serial Port and Test Connection
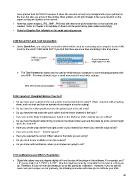
Under Serial Port, you select the connection which will be used for connecting your computer to your KNK.
Look for the words “USB Serial Port” if you find that there are more than one listing in the drop menu:
KNK is assigned
to COM 7 A serial connection
might appear as this.
The Test Connection button can be used to verify that your computer is communicating properly with
your KNK. Pressing it should cause a small movement of your blade carriage.
Click here to test communication
2.09 Important Checklist Before You Cut!
Do you have your material on the mat and the mat inserted into the cutter? (Note: materials with a backing
sheet, such as vinyl and iron-on transfer do not require a mat for cutting)
Do you have the rollers positioned over the gridded part of the grit shaft?
Do you have the mat under the pinch rollers and the levers lowered in the back?
Have you set the blade length/exposure based on the thickness of the material you are cutting?
Do you have the blade holder firmly mounted in the blade holder seat and the blade tip at the correct height
above the material?
Have you set the origin at the front right corner of your material (or where you need the origin to be)?
Have you set the force? And the speed?
Have you selected the correct Offset value for the blade you are using?
Do you need to turn on Multi-cut for this material?
Do you know, with confidence, where your shapes are going to cut?
2.10 Calibrating your KNK’s Resolution
Digital die cutters may cut shapes slightly off from the size of the shape in the software. For example, an 8”
x 8” square might cut 7-15/16” x 8-1/32”. Now this might be perfectly acceptable for the type of cutting you
do. Therefore, it may not even be necessary to do this particular calibration. However, if you do want to
make sure your shapes are cut precisely, the following procedure will allow you to calibrate your KNK.
28