Page 221 - KNK Maxx Groove-e with MTC User Manual
P. 221
After the hole is cut in the chipboard, do not lift the pinch wheel levers! This is important. You can go offline
and use the up/down arrows to move the mat so that the cut circle can be removed. Then the actual dog tag
is placed inside the cut hole. Tape is used to secure the tag:
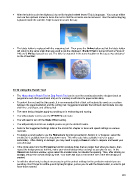
The blade holder is replaced with the engraving tool. Then press the Online button so that the blade holder
will return to the same origin that was used to cut the chipboard. Blade Offset is turned off and a Force of
140 and 3 Multicut passes are set. The letter is engraved in the same location on the tag as was designed
on the Virtual Mat:
10.10 Using the Punch Tool
The Maxx drop-in Punch Tool or Zing Punch Tool can be used for creating decorative designs (such as
pergamano and other parchment arts) or for creating small holes for paper embroidery.
To protect the mat and the thin punch, it is recommended that a thick soft material be used as a cushion
between the paper/cardstock and the cutting mat. Suggested materials that will work well include non-slip
shelf liner, craft foam, and stiffened felt.
The same basic principles apply to punching as in embossing and scoring:
You will probably need to use the WYSIWYG cut mode.
You will need to turn off the Blade Offset setting.
You will possibly need to use multiple passes to get the desired results.
Refer to the Suggested Settings table at the end of this chapter or force and speed settings on various
materials.
To design a punch pattern, use the Rhinestone function presented in Section 8.12 however, select the
smallest size available from the drop down menu. This will create holes suitable in size for paper
embroidery. After clicking on Accept, you may need to apply a Break in order to respace and tweak your
overall design.
If the circle sizes from the Rhinestone function produce holes that are larger than what you desire, then
repeat the design process but first, make your overall design twice as large as you plan to use. In the
Rhinestone function window, again select the smallest size, but double the spacing. Then, after clicking on
Accept, reduce the overall design by half! Your holes will now cut at half the size of the first design you
created.
As with the other tools, testing is necessary to get the perfect settings for the particular material you are
punching. Don’t forget to set the punch tip height higher, just as you do with the blade holder, in order to get
more force invoked.
221